MICROBLADING TRAINING AND REVIEWS

What is Microblading?

Microblading or (eyebrow embroidery) is the hottest must-have qualification amongst Permanent Makeup Technicians! Microblading is carried out by using a special manual hand-tool, which holds disposable micro-blades. The pigment is deposited into the epidermis very carefully with the Microblade hand-tool which allows the technician to create super fine crisp hair-strokes, compared to using digital needle cartridge configuration.

The pigments are inserted closer to the surface, therefore the strokes appear crisp and very fine, there is no fading under the skin!

Our comprehensive training manual will be received on the day of the training class. It will be a fab reference guide for you to use once your training has finished.

What is included in our Training?

• Health & Safety
• Structure of Skin
• Brow Shapes
• Skin Diseases & Disorders
• Clients Consultation
• Different patterns & Shapes
• Setting up for Treatment & preparing the client
• Skin Anatomy
• Introduction of Permanent Makeup
• Sterilization/Sanitation
• Client information forms/Medical History/Consent Forms
• Color & Pigment Theory
• Needles
• Aftercare
• Practice Procedures
• Misc/insurance/liability

Who: Professionals wanting a career in #1 Permanent Makeup Industry

What: Two-day high-intensity Microblading Certification Training Academy

Where: Flash Your Style 118 Keene Rd. Richland WA 99352

When: December 3rd & 4th

How: Contact your Microblading Semi-Permanent Make-up Trainer (509) 572-2777

Cost: $2900, $500 enrollment deposit (is applied to balance owing) also includes our Premier Microblading Kit to start your business!

All deposits are non-refundable.

2-Day All-inclusive Microblading Course
If you want to be among the HIGHEST PAID BEAUTY PROFESSIONALS in the industry, then you need to Get Certified as a Microblading Technician.

Click this —> https://www.flashyourstyleofficial.com/microblading

For more information, you can like, follow or join our Facebook Groups

Flash Your Style Page

?‍?Social Media Lash Tips??

Fibroblast USA Professional Group

Online Microblading & Fibroblast Training Worldwide Flash Your Style

Online Microblading & Fibroblasting Training WorldWide

Beginners Guide to Eye Makeup


Are you a beginner in makeup?

That’s alright, We’ve all gone through that, not knowing what brush to use, where to apply eyeshadow, let alone how to blend properly. But don’t worry, we’ve got your back! This makeup tutorial will help any beginner learn how to do eye makeup correctly and beautifully from here on out.

Are you ready to learn some insider tips and tricks about eye makeup application? If YES, keep reading!


Step 1

Always start with an eye primer.

Eye primer helps create a smooth surface for the eye makeup. Once the primer has dried, you can apply an eyeshadow base that helps make the eyeshadow stick to the skin better. If you don’t have an eyeshadow base, a concealer or foundation will do.

Eye Makeup 02

Step 2

Start with 4 basic shades.

For beginners, you want to start with 4 basic shades to pull off an everyday natural look. You need a highlighter that is a shade lighter than your skin tone, a matte mid-tone shade, a contour shade that is 2-3 shades darker than the skin and a matte black shade. If you have a facial highlighter, you can use that too.

Eye Makeup 03

LEARN WITH A BASIC EYESHADOW PALETTE FIRST.

Step 3

Grab the essential eye makeup brushes.

You will need a small flat eyeshadow brush for application, a small and medium-sized blending brush and a smudger (optional).

Eye Makeup 04

GET THE RIGHT EYE MAKEUP BRUSHES.

Step 4

Glide your flat brush on the lightest shade and apply this on the inner corner of the eyes. This is where most of the product should be and then you can easily blend outwards after.

Make sure to tap your brush before applying to remove excess product.

Eye Makeup 05

APPLY THE HIGHLIGHTER IN THE INNER CORNER OF THE EYES.

Step 5

Here’s a neat trick you can try: Dip the tip of the brush in water enough to dampen it. Then glide it on the eyeshadow and apply again in the inner-most corner of the eyes (tear duct area). You’ll be amazed at how pigmented it is.

Eye Makeup 06

USE THE DAMP BRUSH TRICK TO GET MORE COLOR.

When you’re done with that, use the same color and highlight the arch of your eyebrows.

Eye Makeup 07

HIGHLIGHT THE EYEBROW FOR A DEFINED ARCH.

Step 6

Now on to the mid-tone shade. Use a blending brush to apply the eyeshadow above the crease, blending from the outer corner inwards.

Eye Makeup 08

WORK ON YOUR CREASE.

How will you know you didn’t overdo it with the shadow? Hold your brush at the edge of your nose going up to the edge of the eyes. Anything below the line should be clear.

Eye Makeup 09

USE THIS TRICK TO CHECK IF YOU HAVE ENOUGH EYE MAKEUP ON.

Step 7

Contour the eyes.

Using the contour shade, apply from the outer corner while blending into the crease on the outer half of the eye. Please make sure that you don’t blend too high because the mid-tone shade should always be higher than the contour shade.

Eye Makeup 10

CONTOUR THE EYES FOR ADDED DEPTH.

Step 8

Your eyelid makeup is done so you can now proceed to the bottom part of the eye. Mix the mid-tone color and the contour shade and apply on the bottom lash line starting from the outer corner until it meets the highlighter.

Eye Makeup 11

FILL IN THE BOTTOM LASH LINE.

Step 9

To complete the look, apply the matte black eyeshadow on the outer corner of the eyes and close to the bottom lash line. This will make the eyes a little more dramatic.

Eye Makeup 12

USE BLACK FOR MORE DRAMA.

Step 10

But of course, it won’t look as pretty if your lashes aren’t curled…

Eye Makeup 13

CURL THE LASHES.

then mascara…

Eye Makeup 14

USE A MASCARA SHIELD TO PREVENT IT FROM TOUCHING THE FACE.

eyeliner….

Eye Makeup 15

ADD EYELINER FOR MORE EYE DEFINITION.

and with practice, false eyelashes too!

Eye Makeup 16

WEAR FALSE EYELASHES FOR EXTRA DRAMATIC EYES.

As you can see, this basic natural eye makeup is quite easy and with some practice, you’ll be able to master it. Once you do, blending colors and creating new looks will be as easy as eating pie!

For more tips, you can like and join our facebook groups

Flash Your Style Page

?‍?Social Media Lash Tips??

Fibroblast USA Professional Group

Online Microblading & Fibroblast Training Worldwide Flash Your Style

Online Microblading & Fibroblasting Training WorldWide

Beauty Hacks 101

How many beauty bloggers you bookmarked on your computer? (their tips are super helpful when you’re having a DIY makeup malfunction!) Probably a lot? We are also a fan of Beauty Hacks, so this blog is all about Beauty Hacks. We will help you from makeup application tweaks to hair styling help to at-home DIY products.


Below, life-changing beauty hacks from the pros.


1. Use white eyeliner as a shadow base

We’ve heard of using white eyeliner on the lower lash line to make eyes appear larger, but we had no idea it could be used as a base coat, as Kara Manos, of Politics of Pretty, suggests. 
To try at home, we recommend: NYX Cosmetics Jumbo Eye Pencil in Milk, $4.50; nyxcosmetics.com

2. Refresh mascara with Vaseline

Re-applying mascara mid-day usually leads to a clumpy mess of eyelashes. But thanks to this helpful hack from YouTube vlogger Elle Fowler, we’re bidding adieu to crunchy clumps forever.

To try at home, we recommend: Vaseline Original Jelly, $3.69 for 7.5 oz.; at drugstores

3. Contour your ABC’s

When it comes to contouring, Kim Kardashian‘s professionally chiseled cheekbones immediately come to mind. So when Annie Atkinson, of She’s In Glow, explained that the process is actually quite simpler than having a pro shape your face with bronzer and illuminator on the daily, we were hooked.

To try at home, we recommend: Tom Ford Shade & Illuminate in Intensity One kit, $75; nordstrom.com

4. Create your own lip exfoliator

Exfoliating doesn’t have to be fancy and expensive—just take Ann Colville Somma’s, of Cult of Pretty, advice!

To try at home, we recommend: Buf-Puf Facial Sponge, $4.09; drugstore.com
Vaseline Original Jelly, $3.69 for 7.5 oz.; at drugstores

5. Start a skin diary

When using any many products as we do on a daily basis, sometimes it’s hard to keep track of how our bodies react. But now we can, thanks to Manos.

6. Invest in a cuticle does-it-all

Cuticle care doesn’t seem like something that should be taken so seriously, but, according to Maria Vlezko, of SoNailicious.com, it totally should—you just need to find the right product to do it all.

To try at home, we recommend: Orly Cutique Cuticle & Stain Remover, $10; orlybeauty.com

7. Follow these five steps to healthy, long nails

And to get your healthiest nails yet, Vlezko recommends following these five tips to protect and strengthen your nail beds and cuticles:
1. Protect—Use a base coat that contains calcium and proteins to strengthen and thicken
2. File and buff—File once a week to keep nails healthy. It’s like trimming split ends to prevent future damage
3. Moisturize—Hydrate hands and cuticles daily to keep them soft and moisturized
4. Prevent—Wear gloves when you’re doing house and yard work and never use your nails to pick or pry things
5. Supplement—Eat vitamins and eat well to keep nails strong

8. Perfect your braid with a styling cocktail

Were all about using volumizing products to add shape to our ‘dos, but we never thought to mix them with wax. That is, until Stephanie Brinkerhoff, of Hair and Makeup by Stephanie, mentioned it. Now, we’re never looking back.

To try at home, we recommend: Sexy Hair Big Sexy Powder Play, $16.95; sexyhair.com
Redken Wax Blast 10 High Impact Finishing Spray Wax, $18; redken.com

9. Research products on message boards

When thinking of making a major purchase, you should always do your homework on the brand and read through customer reviews to find out if the product truly is right for you. And according to Keiko Lynn, of KeikoLynn.com, the same goes for makeup!

and lastly for your Eyelashes, Microblading, Fibrolasting and Waxing,

10. Flash Your Style Reviews

Flash Your Style, LLC was founded in 2011 by Leslie Miller, Laura Paullin and Lisa Vanklinken with the help of a team of physicians and scientists. Flash Your Style was able to produce and perfect the safest products and techniques, and the company is quickly becoming the world’s finest training academy and distributor of eyelash extension products.

Flash Your Style, LLC continues to be a leader in the field of eyelash extensions and is committed to providing safe, beautiful, flawless eyelash extensions to enhance any woman’s natural beauty.


Check our 434 facebook reviews at Flash Your Style Facebook Page


Charcoal Trend | Flash Your Style

Is the Charcoal Trend Here to Stay?

Castor oil, turmeric, the fermentation craze… beauty trends tend to take some unexpected turns.

And you never know which ones will stick around and which ones will speed by, never to be heard from again.

One trend that doesn’t seem to be going anywhere?

Many claims it makes your teeth whiter, has powerful effects in smoothies and face masks alike, and sometimes saves lives.

It’s a bird, it’s a plane, it’s…

Charcoal! so what is Charcoal?

Articles calling charcoal the “latest beauty trend” started popping up a few years ago.

The New York Times featured charcoal in its “Beauty Spot” section as far back as 2013, and it seems this trend was built to last!

Check out Amazon’s Best Sellers in Skincare list at any given time, and you’re bound to find at least one charcoal product there.

(Today a charcoal blackhead removing mask sits at #21.)

What’s behind all this popularity?

And is there any science to its effectiveness, or does it just make for attention-grabbing product pics on Insta?

Let’s dive into the science behind it, the difference between charcoal and activated charcoal, and the true effects it can have on your skin.

What Is Charcoal and What Does It Do?

Charcoal of the everyday grilling-out variety has been made by humans for somewhere around 30,000 years.

Fun fact: The name “Collier” refers back to early craftsmen who perfected the art of charcoal production by burying the wood in underground pits.

They were called “colliers.”

Charcoal is made by burning wood in a low oxygen environment until you end up with lumps of mostly pure carbon.

It can also be made from other materials such as coconut shells, petroleum products, and peat moss.

Weird fact: Chef Dan Barber of Hudson Valley restaurant, Blue Hill at Stone Barns, famously makes charcoal from animals bones, which he then cooks with.

Activated charcoal of the well-known hangover-curing, skin-clearing, teeth-whitening variety, is made differently from standard charcoal.

Activated charcoal is processed differently, at higher temps, which makes it more porous than regular charcoal.

From what I understand, the “activation” part of the process involves either steam or phosphoric acid, very high temps, and results in a char that’s more porous and therefore has a much greater surface area than regular charcoal.

This all should remove impurities and enhance its capacity to adsorb (not a typo…adsorbmeans compounds adhere to the surface of rather than being broken down and taken into another substance).

While the important quality of regular charcoal is its ability to burn for a long time at a high temp, the important quality of activated charcoal is its ability to absorb toxins.

History tells us that the ancient Egyptians used charcoal back in 1500 BC for digestive troubles, and back in 400 BC the Phoenicians used activated charcoal to purify water.

That means activated charcoal’s reputation as a detox material goes back a very long time.

And it’s that reputation that makes it so popular today.

Plus the fact that it swept the Instagram world when shops like Little Damage in L.A. started mixing it into ice cream (we’re easily entertained, aren’t we!), a practice that’s now banned in New York City, btw. More on that later.

Why Now?

We know part of the reason for its popularity for sure, the fact that it makes for some photogenic and attention-grabbing social media posts.

The other reason that it’s caught on, though, is that built-in ability to absorb and carry toxins out of the body or away from the skin.

Activated charcoal has a unique ability to detoxify at a time when we are more aware than ever of the damaging potential of all the chemicals and toxic compounds were now exposed to on a daily basis, especially in urban areas.

In this age when clean eating and clean living has become our mantra, charcoal has stepped onto the stage promising to carry away impurities and cleanse us from the toxic byproducts of our busy lives.

Add to that the growing acceptance of alternative and ancient medicinal and wellness practices, which are now fully entrenched in the mainstream, and you can see why charcoal caught on the way it did.

Now, in addition to charcoal ice cream, you can get everything from a charcoal toothbrush to charcoal-infused sponges to charcoal-activated lemonade.

And of course, there are the skincare products!

Bar soap, sheet masks, mud masks, oil cleansers, hand soap, to name a few.

Now that charcoal has caught hold in the public imagination, it seems to sell itself…

It’s generally described as this magical nature-made magnet that attracts oil and dirt and then carries it away.

Who wouldn’t want that?!

And why would New York want to ban it from our smoothies and ice cream?

Charcoal’s Health Benefits

So, it seems like a good question: is charcoal healthy or not?

Detox is a good thing certainly, and charcoal’s ability to bind unwanted substances to its surface and then carry them away sounds amazing.

It’s that very ability, in fact, that accounts for the use of activated charcoal in emergency room settings to treat cases of poisoning or drug overdose.

If it can absorb poisonous substances from your stomach before they’re absorbed into the blood, it must be good for you?

It stands to reason, but it’s more complicated than that.

Like vitamins and other supplements, the FDA doesn’t regulate activated charcoal as a drug, and this means it doesn’t have to meet up to any standards of effectiveness before ending up in your food or products.

The FDA does impose manufacturing standards on supplements, however, and it’s unclear if those apply to charcoal or not, but probably not.

It seems that the reason New York City banned the substance in foods comes down to the fact that the FDA has not approved activated charcoal as either a food additive or a food coloring agent.

The city’s Department of Health has gone so far as to say that the FDA has “prohibited” the use of it in foods, but that claim doesn’t seem to hold water as far as I can tell.

Sooo, we seem to be in a “use your best judgment” grey area when it comes to adding it to our foods or using it for health purposes.

What we do know is that it’s particularly good at absorbing things and carrying them out of your body.

And medical experts say it doesn’t pose any great risk in small amounts.

But… it’s not selective. Charcoal doesn’t seek out and find toxins to carry away, it binds to lots of things.

Like nutrients and other beneficial particles.

When you consume charcoal-tinted dairy products then, it’s probably carrying away the calcium in the milk along with it.

What about your prescription meds or other dietary supplements? Another unknown.

Meanwhile, I’m not a nutritionist, so I’ll leave it for you to decide.

Just know that actual benefits may have been slightly exaggerated.

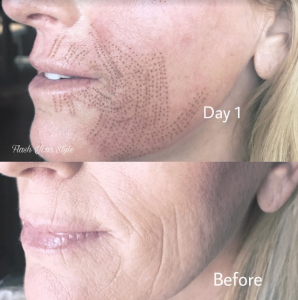
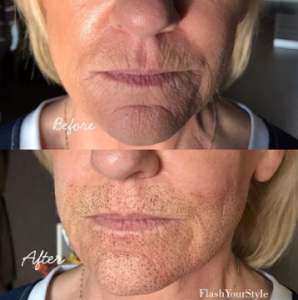
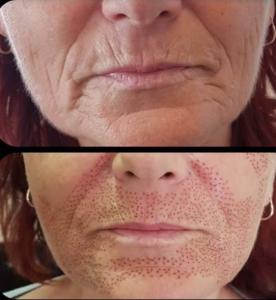
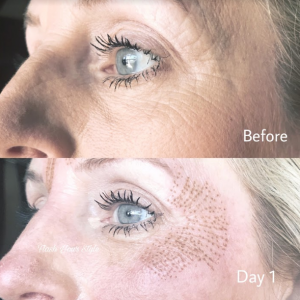
The Skin Benefits of Charcoal

And now, what we’ve all been waiting for…can charcoal really help clear up skin?

Anecdotally speaking, yes.

More studies will be needed before we have the science to back up claims about its effectiveness in skincare, though.

For now, its benefits will have to remain more of a belief that a fact, but keep in mind that many natural treatments fall into that same category.

We may know how a substance acts and responds in most settings, but it would take clinical trials to prove definitively that a substance has consistent effects across lots of conditions and on lots of people.

Those studies haven’t been done with activated charcoal, yet obviously many people love the way their skin looks and feels after a cleanse with charcoal soap or after removing a charcoal mask.

Many swear by its ability to reduce the appearance of blackheads, for instance.

If it makes you love the way your skin looks and feels, then I say go for it!

But I also recommend you don’t use large amounts of it on your skin too often…daily would be too much in my opinion.

Why? Because as I mentioned, the charcoal won’t discriminate when it comes to adsorption.

That means it could strip your skin of its natural protective barrier over time if you overdo it.

One study did show that activated charcoal combined with silver, “may help remove fluids and toxins that impair the healing process” in wounds, so that bodes well for its use for normal skin flare-ups.

The principle behind its use on healthy skin is the same: unwanted bacteria, oils, dirt, and other harmful substances are thought to bind to the activated charcoal rather than staying in pores or on the surface where it will eventually cause trouble.

Once you wash the cleanser or mask off, those pollutants should wash away as well, leaving purer, cleaner skin behind.

And that sounds like a great time to follow up with a restoring nutrient-packed serum for maximum impact.

You’ll Find Charcoal In a Variety of Foods

If you want to try charcoal for whole body detox, you’re in luck.

You can now consume it in the form of smoothies, lemonades, desserts, pizza crusts, and more.

Just for fun, here’s a quick sample of some of the charcoal-infused food products you’ll now find on the market.

Project Juice (online and around California) 

This company sells a super-food drink called “cold-pressed Black Magic.”

It contains purified water, lemon, raw agave, cayenne, and activated coconut charcoal.

The benefits include vitamin C for immunity and capsaicin, which boosts metabolism.

It makes you wonder, though, does the activated charcoal adsorb those too?

Juice Supply (online and Dallas) 

Like many juice bars, Juice Supply has an activated charcoal “fix” that can be added to any of its juices or smoothies.

In addition, their Advanced Cleanse includes Charcoal Lemonade that you’re directed to drink “upon awakening.”

The lemonade contains activated charcoal, lemon, pink peppercorn, coconut palm sugar, and alkaline water.

Final Thoughts

Remember, beauties, we don’t know much about the effects of this crazy-popular trend over the long term if you’re adding it to food or drink, and you definitely don’t want to overdo it.

In the short term, it doesn’t pose any great risk, though the benefits when mixed with vitamins and super-food substances seems questionable.

On your skin, though, it most likely does what it’s known for – adsorbs substances trapped in pores and on the surface, giving you a clean slate and cleaner skin.

Its beneficial effect on occasional flare-ups and breakouts are a good bet, too.

If you love it and see good results on your skin, that’s great, but probably still best if you don’t use it as often as daily.

Keep in mind, this is my opinion as the science isn’t there yet to back up the popular claims.

I think we can all agree, though, that adding a hangover remedy to your cocktail is genius!


More questions? Email us at flashyourstylebeauty@outlook.com

The Essential Eyebrow Guide & Everything You Need to Know About Microblading (Part 4)

Semi-permanent Brow Solutions

Tinting

Tinting is great if your eyebrows are fair, need a boost, or if you just want to cut down on your get-ready time.

This is a service which involves applying a semi-permanent dye to your brows to add thickness, shading, and definition.

It’s also definitely the way to go if you change your hair color and want your brows to match.

shutterstock_90206206

This isn’t an end-all eyebrow solution.

There is some upkeep, as the color fades after about four weeks.

And, you might still have to supplement tinting with makeup in some spots.

I wouldn’t recommend attempting a tint job on your own.

Leave this technique to the professionals!

Most specialists use a vegetable-based dye on eyebrows rather than a regular hair dye.

They’re also experienced at color matching, so they’ll make sure your eyebrows look more natural and less Mommy Dearest.

Microblading

If your eyebrows are thin or nonexistent, a few years ago tattooing might have been your only hope for creating brows without drawing them on every day.

Today, the trending technique is Microblading, AKA “eyebrow embroidery”, for natural-looking, semi-permanent arches.

It’s a great option to reconstruct missing brows or fill in/reshape existing ones.

In this process, a specialist uses a small tool equipped with tiny blades or needles which are dipped into pigment and then deposited into the top layers of skin in strokes.

The result looks like realistic individual hairs and appears more natural than the filled in look of traditional tattooed makeup.

Celebrities are jumping on this trend too.

Actress, Bella Thorne recently Snapchatted her microblading process and posted the awesome results on Instagram.

bellathorne

The whole procedure takes anywhere from 30 minutes to an hour.

A specialist will pre-draw on your eyebrows with a pencil until you both agree on a shape.

And, though a numbing gel is applied before, it’s not a completely painless process.

Most reviewers put the pain level on par with a threading or tweezing job, but say it’s worth it for the incredible results!

You might be instructed to avoid getting your new brows wet for anywhere from a couple days to a week afterward, and to apply a healing ointment regularly.

Microblading artists warn clients not to freak out if their brows appear darker right after the procedure.

Color usually fades over two weeks to a more natural shade.

It’s also a two-step process.

You’ll have to go back for touch ups after 4-6 weeks to fill in spots and make adjustments.

This is a great time to address any concerns or point out spots you’d like fixed with your specialist.

Downsides?

It’s not permanent, lasting an average of 1-3 years, and can be on the pricey side but not on our salon.

However, the results are pretty impressive, and they really alleviate that no-one-sees-me-without-my-brows anxiety.


IF YOU LOVE THIS BLOG, PRESS THE SHARE BUTTON AND WE WILL KEEP YOU UPDATED FOR THE LAST PART OF THE EYEBROW GUIDE & EVERYTHING ABOUT MICROBLADING 


Want a 2-day training class? 2-days hands-on workshop on two live models!


REGISTER HERE

https://www.flashyourstyleofficial.com/microblading

Order Page

www.flashyourstyle.net

SPACE IS LIMITED!!!!

More questions? Email us at flashyourstylebeauty@outlook.com

The Essential Eyebrow Guide & Everything You Need to Know About Microblading (Part 3)

Fill Them In

But how to draw eyebrows, you ask?

Let’s find out!

Full eyebrows not only frame your eyes, but they also add a bit of youth to your overall look.

Start by using a pencil to define the bottom line of your eyebrows and lengthen the outer ends.

Next, use an angled brush and some brow powder to fill in sparse areas.

Finally, brush brows with a spooly brush to soften and blend color.

Brow-Shaping-Tips

To add definition and brightness, use a small brush to outline brows with a bit of concealer and blend outward.

You can also brush a little highlighter on your brow bone to lighten up eyes.

Keep Them In Place

Let’s avoid that moment when you look in the mirror only to realize your eyebrows disappeared at the first sign of sweat.

Finish up your brows by setting them in place with a brow wax or gel.

You can also go over them with a light dusting of translucent setting powder.

If you really need some budge-proof assurance, go with an eyebrow sealer to put those ladies on lockdown for all day wear.

You’re good to go!

Is it possible to grow back my eyebrows?

If you’ve gone tweezer crazy, are trying to recoup your losses from the thin-brow trend, or just want fuller-looking eyebrows, there is hope.

The first step is to stop tweezing and start regrowing hairs.

Some will never grow back due to dead hair follicles.

But, it also takes a cycle of 28 days for the hair to regenerate, so be patient while you wait for each of those little hairs to spring up.

You can also try a growth serum which includes peptides and biotin to enhance eyebrows by encouraging hair growth and thickening hairs.

IF YOU LOVE THIS BLOG, PRESS THE SHARE BUTTON AND WE WILL KEEP YOU UPDATED FOR PART 4 OF THE EYEBROW GUIDE & EVERYTHING ABOUT MICROBLADING 


Want a 2-day training class? 2-days hands-on workshop on two live models!


REGISTER HERE

https://www.flashyourstyleofficial.com/microblading

Order Page

www.flashyourstyle.net

SPACE IS LIMITED!!!!

More questions? Email us at flashyourstylebeauty@outlook.com

THE EYEBROW GUIDE & EVERYTHING ABOUT MICROBLADING PART 2

Build Perfect Arches

Ladies, we’re hardly pioneers when it comes to the quest for perfect brows.

Dating back to as early as 3500 B.C., ancient Egyptians used carbon to draw on and define their brows.

Have you seen Cleopatra?

Eyebrow game on point!

Luckily, today’s methods for achieving bold, beautiful brows are more doable than ever!

Shape Them

Shaping up your eyebrows is easier than you think.

You can seek the help of a professional, or you can do it at home with these easy steps.

Step 1: Find Your Starting Point

Grab a makeup brush (or chopstick, Tweezers, etc.) and hold it vertically next to the outer edge of your nostril so it makes a straight line up to your eyebrow.

Wherever it lands is your starting point.

Use a makeup pencil to mark that spot on both eyebrows and tweeze anything in between in the unibrow zone above the bridge of your nose.

starting point

Step 2: Find Your Arch

Look straight ahead in a mirror.

Hold your brush so it goes from the corner of your nose and makes a line through the center of your iris up to your brow bone.

This is the peak of your arch.

Mark this point and taper the outer end of your eyebrow so it’s slightly thinner.

arch

Step 3: Find Your End Point

Finally, hold your brush at an angle so it creates a straight line from your nose to the outer corner of your eye.

This is the spot where your eyebrow should end and/or where your pencil line will stop when filling in your brows.

end

Pro Tip:

This might go without saying, but I’m going to say it anyway: don’t over-tweeze!

It can be really tempting to go pluck-crazy and wind up with bare spots or brows that are too thin.

Remove a couple hairs at a time and stand back to assess your work.

If you’re attempting to even out your brows to make them match, the answer might be makeup rather than tweezing.


IF YOU LOVE THIS BLOG, PRESS THE SHARE BUTTON AND WE WILL KEEP YOU UPDATED FOR PART 3 OF THE EYEBROW GUIDE & EVERYTHING ABOUT MICROBLADING 


Want a 2-day training class? 2-days hands-on workshop on two live models!


REGISTER HERE

https://www.flashyourstyleofficial.com/microblading

Order Page

www.flashyourstyle.net

SPACE IS LIMITED!!!!

More questions? Email us at flashyourstylebeauty@outlook.com

THE EYEBROW GUIDE & EVERYTHING ABOUT MICROBLADING PART 1

Did you also know that eyebrows have a purpose?

They help keep your eyes free of dust and dirt, and their shape deflects rain and sweat so it runs down the sides of your face rather than in your eyes!

Who knew?

Today, I’m excited to bring you the essential guide for all things eyebrows.

We’ll look at some tips and tricks so you can emerge victorious in the Battle of the Brows!

Get Your Groom On

If you’re one of the chosen that have naturally shaped eyebrows that require little to no maintenance, you’re a lucky ducky!

For the rest of us, keeping our brows cleaned up can be anywhere from a minor inconvenience to a painful experience.

When it comes to grooming, we have a few options:

Tweezing

“Ladies tweeze, plucking is for chickens.”

We’ve been well acquainted with this method of pulling out individual hairs since the first time we grabbed a pair of Tweezers embarked on a journey of eye-watering brow-shaping.

Pros: Great for quick, regular maintenance. It’s also inexpensive and doesn’t require a trip to the salon.

Cons: Can cause skin irritation and ingrown hairs. It may not last as long as other hair removal methods. And, you run the risk of over-tweezing resulting in too-skinny brows or hair that never grows back.

Waxing

We’re probably all familiar with this process in which heated wax is applied to the area of unwanted hair and then quickly removed to pull hairs out at the root.

Although at-home waxing kits are available, I’d strongly recommend you seek out an expert so you don’t risk burns or removing skin.

Pros: Temporarily removes hair for anywhere from 2 to 6 weeks, and many people report smoother skin and fewer ingrown hairs as a result.

Cons: It hurts (obviously). It can cause skin irritation, redness and, in some cases, residual or permanent hyperpigmentation. It also requires some growth to be effective, so keep that in mind if you don’t want walk around with unkempt brows leading up to your wax sesh.

Threading

This is an ancient practice that originated in India or Central Asia (depending on who you ask).

In this technique, a practitioner uses a twisted piece of thread to pull unwanted hair from the follicle.

Pros: It’s gentler on skin than waxing and allows for more precision and definition, especially for shaping brows.

Cons: I’m not gonna lie, it hurts. And it takes a little longer, so it’s not one quick pain like waxing. It can also cause some redness and skin irritation, so you may want to avoid getting threaded just before you go out.


IF YOU LOVE THIS BLOG, PRESS THE SHARE BUTTON AND WE WILL KEEP YOU UPDATED FOR PART 2 OF THE EYEBROW GUIDE & EVERYTHING ABOUT MICROBLADING 


Want a 2-day training class? 2-days hands-on workshop on two live models!


REGISTER HERE

https://www.flashyourstyleofficial.com/microblading

Order Page

www.flashyourstyle.net

SPACE IS LIMITED!!!!

More questions? Email us at flashyourstylebeauty@outlook.com

The Best Lashes For Your Eye Shape | Flash Your Style

The Best Lashes For Your Eye Shape 


Ever think false eyelashes look extra false on some people? And yet others seem to pull them off with ease? According to some of the eyelash artists, certain styles complement particular eye shapes better than others. To help you find the perfect lashes for your eye shape (whether they’re pharmacy-bought or professional mink extensions) we search six experts for their advice.


“I always take my client’s eye shape into consideration before I apply a single lash. Everyone’s eyes are unique and their lashes should be too! For example, hooded eyelids have an extra layer of skin that sits over the crease, making the lids appear smaller. For this eye shape, we recommend a style that has longer lashes in the centre of the eyes to open them.

Close-set eyes, on the other hand, don’t have a lot of space between them. To make them appear wider, it’s best to use natural looking lashes that are shorter at the inner corners of the eyes and longer lashes toward the outer corners. Round eyes have the same width and height. This eye shape looks best when longer lash extensions are applied to the outer corners of the eyes, creating a natural cat eye effect.”
– Jennifer Mahon, The Brow Artist

Photo credit: Instagram @lashesbyjennifermahon


“Your eye shape is definitely a big factor in finding a lash look that will complement you. Every set of lashes I complete are tailored to that specific client. Bigger is not always best! A lot of aspects come into play when deciding what look will work and more importantly, what will last. This is why a good consultation is essential! Make sure your technician knows what look you are hoping to achieve and together you can decide what will be the best option!”
– Olivia Fitzsimons, Olivia Fitzsimons Beauty

Photo credit: Instagram @oliviafitzsimonsbeauty


“Lash extensions are not a ‘one size fits all’. Your eye shape should definitely be taken into consideration by your lash artist. Round eyes and almond shape eyes will need accentuating at different points, as will downward or upward sloping eyes. This should be thoroughly discussed in your consultation, as should the health of your natural lashes and your overall desired effect.”
– Rachel Bryan, Claudine King

Photo credit: Instagram @claudinekingbrows


“I always take my clients eye shape and lifestyle into consideration when applying lashes. If a client does not wear a lot of make-up and has short, natural eyelashes she will look ridiculous with very long, thick extensions. My pet hate are lashes that overpower the face. Extensions should enhance your eyes and face – I do not like ‘over done’ extensions where, when you meet someone, all you see are their lashes.
Almond shaped eyes suit most lashes, however other eye shapes can require a little more thought. For hooded eyes, I like a tapered look – curled at the outside edge and lengthening towards the middle, then tapering down again. This creates the illusion of depth. Round eyes suit a long, wispy lash that is slightly winged at the edges to elongate the shape. For deep set eyes, longer, thicker lashes will add balance to the face and ‘open’ the eye.”
– Susan Fox, Eden Beauty Group

Photo credit: Instagram @edenbeautygroup


“Eye shape definitely matters. If you have deep set eyes or small eyes we would use different lash lengths, curls and thicknesses. On consultation, I’ll recommend lashes to suit each eye shape and clients expectations.”
– Zanda Wait, Burgundy Beauty (no Image available)


“Here at the Blink Bar, we advise different shapes and styles to suit each client’s eye. Some lash extensions, if applied wrong, can make the eyes appear more tired and down-turned. Our goal is to make the client look awake and lifted.”
– Harriet Mackey, The Blink Bar

Photo credit: Instagram @the.blink.bar


Harriet Mackey, Jennifer Mahon, Olivia Fitzsimons, Rachel Bryan, Susan Fox, and Zanda Wait are nominated for Best Eyelash Artist in this year’s IMAGE Business of Beauty Awards.


Eyelash Extension Training

Come and learn! One day hands-on workshop!

Eyelash Extension Training Class and Certification!

Class comes with a fully stocked kit, enough to start your business!

Click this link to join https://www.flashyourstyleofficial.com/lashextension-optin

More questions? Email us at flashyourstylebeauty@outlook.com and don’t forget to join our Social Media Lash Tips on Facebook for more Eyelash Extension Tips!

Fibroblasting! All you need to know! | Flash Your Style

DID YOU KNOW… FIBROBLASTS ARE THE MOST COMMON CELLS IN CONNECTIVE TISSUE?

 
According to the Collins Dictionary the definition for fibroblast is “a cell in connective tissue that synthesizes collagen”.

Fibroblasts are tiny cells found in the lower levels of the dermis. As you get older the number of fibroblasts begin to decrease, meaning your collagen and elastin and more begins to reduce leading to wrinkles. They’re very important in keeping our skins structure elastic and healthy. Fibroblasts create the extracellular matrix which gives your skin its structure.

Fibroblast is the only cosmetic treatment to use plasma to reduce the volume of excess skin. Low risk, minimal downtime and more affordable than surgery. Fibroblast Treatment is known for its success with Non Surgical Eye Lifts, Tummy Tightening, Neck Tightening and so much more.  

The term “Soft Surgery” is used to describe the treatment because it delivers results similar to surgery, with no scalpel, stitches or bandages and minimal downtime.  A minimally invasive procedure with much lower risk and at a more affordable price than actual surgery.

HOW DOES FIBROBLAST TREATMENT WORK?

 
Fibroblast is a relatively new innovation in the beauty industry in North America but has been used for a number of years in Europe. The extremely accurate hand held device works by utilizing the voltage in the air between its tip and the natural gasses emitted from our skin, to form a plasma charge. A small electrical arc is created and instantly shrinks the targeted skin.  The tissues retract and tighten giving you more youthful looking skin.

A specialized device is used to deliver an ionized gas (the plasma), which charges the air just above the skin. This process generates a tiny lightning bolt that damages existing skin cells and causes them to contract. And that’s when the magic happens – the skin’s natural healing processes go into overdrive, encouraging fresh new cells to be produced. These include collagen and elastin, which help to maintain the skin’s elasticity and minimize the appearance of wrinkles. Depending on the intensity of the plasma treatment, the therapy can be used to treat superficial issues such as hyper-pigmentation and fine lines, as well as more extensive ones such as deep wrinkles and sagging skin.

WHAT IS IT USED TO TREAT?


  • Fibroblast is able to treat a number of imperfections without any actual cutting of the skin. It can be used for:
  • Eyelid Tightening, including under eyes and excess upper eyelid skin.
  • Skin imperfections, including skin tags and sunspots.
  • Improvement in the appearance of acne scars  
  • Tightening loose stomach skin after pregnancy.
  • Lines and wrinkles around the mouth.
  • Jowls and Neck Tightening.
  • Knee Caps and Under Arms

WHAT IS IT USED TO TREAT?


  • Crow’s Feet
  • Eyelid Tightening
  • Pigmentation/ Age Spots
  • Tattoo Fading
  • Skin Tags
  • Perioral Lines
  • Acne Scarring
  • Neck lines
  • Glabella Lines (Between Eyebrows)
  • Smokers/ Lip Lines
  • Cheek Wrinkles

WHAT IS IT USED TO TREAT?

 
To minimize any discomfort numbing cream will be applied to the treatment area. It will take 30 minutes for anesthetic to take effect. The procedure itself takes between 15-30 minutes depending on the size of treated area. Your appointment shouldn’t last longer than 1 hour.\

HOW MANY TREATMENTS ARE REQUIRED?

 
The number of treatments required will vary according to the area being treated, skin laxity, the desired degree of correction and the individual’s response to the treatment. Most clients see results instantly and this continues to improve over the course of the following 8 weeks. Further treatments can be carried out to get better results, although it is uncommon to require more than two treatments. Appointments must be spaced out by 8 weeks.

WHAT TO EXPECT-SIDE EFFECTS AND RISKS?

 
Fibroblast is very safe and side-effects are rare but infection, scarring and temporary change of skin pigmentation may occur. Still the majority of clients are likely to experience some minor side effects in the 7-10 days following treatment.

There will be small carbon crusts (little polka dots) in the treated area that will last 7-10 days before naturally lifting, revealing new pink skin beneath. Swelling in the eye area is to be expected for a few days following an upper eyelid treatment. To avoid any more serious side effects such as hyperpigmentation, follow the aftercare recommendations given to you by your technician.

Majority of our patients do not report any of those after a week.

WHO IS AN IDEAL CANDIDATE?


  • The client should be in good health at the time of the appointment, with no preexisting health conditions. If the client displays signs of cold or flu the treatment should be rescheduled.
  •  Clients skin should not be inflamed in the area we are treating prior to the procedure.
  •  Clients prone to keloid scars are not ideal candidates.
  •  Clients with diabetes, healing disorders or lymphatic draining issues should not undergo treatment.
  •  Clients with a sunburn/suntan should postpone treatment.
  •  Clients who have a history of Hyperpigmentation / Hypopigmentation are not ideal candidates.
  •  The client must not display any tanning at the time of the treatment.  
  •  The client must not display herpes simplex (cold sores when working in the lip area) It is recommended they consult with their medical Doctor and begin taking the prescription Valtrex 3 days prior to treatment and 4 days following treatment.
  •  If the client wears a pacemaker avoid treatment with electrical arcing.
  •  Clients who are pregnant or breastfeeding are not ideal candidates.
  •  Clients should have eyelash extensions REMOVED prior to treatment.
  •  This treatment is only recommended on Fitzpatrick Scales 1-3

Fibroblast Treatment is not advised for those with very dark skin. This is because there is a higher risk of hyperpigmentation (dark spots) or hypopigmentation (light spots) following treatment.

DAY OF TREATMENT

 
On the treatment day, it is recommended that no make-up is worn on the treatment area. You may take an anti-histamine 60 minutes prior to your appointment to help with swelling and continue to take anti-histamines for 2-3 days following your appointment.

A numbing agent is applied and left to take effect for up to 45 minutes. When the treatment area is sufficiently numb, the session begins with multiple connections of the fibroblast tip, spaced closely together. You may feel some heat in the treatment area, which may be uncomfortable and slightly irritating. Treatment time is usually between 10-40 minutes, depending on the size of the area.

Immediately after treatment the area may be red and mildly swollen with small carbon crusts (spots).  You may experience a sensation similar to a sunburn which will likely last a few hours. Swelling may intensify over the following few hours and more so when eyes are treated and may last 2-3 days. The carbon crusts will lift within 5 -12 days depending on the individual and area treated. Results gradually improve over the course of the following 8 weeks.  

Following treatment you will be given thorough aftercare instructions to ensure that you see the best results. . In the week following treatment (or until the treatment area has fully healed) an exfoliating wash or cleanser should not be used. Instead opt for a pH balanced soap (dove), and avoid rubbing the area.

COST OF TREATMENT

 
Fibroblast Treatment is certainly more affordable than cosmetic surgery and the prices of treatment depends on the area treated. When comparing a treatment to the cost of surgery.  For exact pricing click on the ‘pricing’ tab above.

CONTRAINDICATIONS


  • Clients should be in good health at the time of the appointment, with no preexisting health conditions. If the client displays signs of cold or flu the treatment should be rescheduled.
  • Clients skin should not be inflamed in the area we are treating prior to procedure.
  • Clients prone to keloid scars are not ideal candidates.
  • Clients with diabetes, healing disorders or lymphatic draining issues should not undergo treatment.
  • Clients with a sunburn/sun tan should postpone treatment.
  • Clients who have a history of Hyperpigmentation are not ideal candidates.
  • Clients must not display any tanning at the time of the treatment.
  • Clients must not display Herpes Simplex Virus (Cold sores/Fever blisters). You will need to reschedule your appointment if you are experiencing an outbreak.  If you have experienced Herpes Simplex Virus (Cold sores/Fever blisters) in the past you must see your Medical Doctor and obtain a prescription for Valtrex and begin taking it 3 days before treatment and for 4 days following treatment. (This applies for treatments surrounding the lip area only)
  • Not for clients with pacemakers.
  • Not for clients who are pregnant or breastfeeding.
  • Clients with Eyelash extensions receiving upper or lower eyelid treatment must have lashes removed prior to treatment and reapplied after 8 weeks.
  • This treatment is only recommended on light-medium skin tones . Anyone with a darker complexions is at risk for Hyperpigmentation.

IS A CONSULTATION REQUIRED?

 
Yes. Anyone interested in Fibroblast procedure is required to have face-to-face consultation. Careful assessment by a specialist will ensure right treatment plan. Multiple factors affect the aging process. Each person and treated area is different and needs to be determined individually. Our goal is to keep clients informed and meet their expectations.

IS FIBROBLAST SAFE?

 
Yes, it is. Fibroblast is an innovative state of the are product made in Germany. It is certified by European CE. This means product meets high safety, health and environmental protection requirements. Fibroblast treatment is already extremely popular across Europe. It quickly becomes choice for those looking into a non-surgical skin lift.

IS FIBROBLAST TREATMENT IS RIGHT FOR ME?

 
Fibroblast can be used for many different skin conditions. Eyelid tightening, body lifting, acne treatment, scar correction, tattoo removal and stretch marks. If you suffer from any of the above conditions but hesitated with traditional surgical procedures, non-invasive Fibroblast treatment may be the right solution for you.


If you’re interested in Fibroblast Plasma Skin Tightening, schedule a complimentary consultation today. You can email us at flashyourstylebeauty@outlook.com, you can also book online at http://www.flashyourstyle.net/book-online/ or Call us at (509) 572-2777